 SOURDOUGH BREAD
The Big Lie
Perhaps you have tried to make a beautiful loaf of naturally leavened sourdough bread, only to have it come out flat. I certainly have, and flat loafs are a common problem. And this is despite the fact that we follow with great effort the recipes found on countless on-line sources that claim wonderful success. Well, I've finally found out why we fail: It's because they lie and don't tell you what you need to know.
Need to Know #1 - Temperature
Recipes
typically say "Put your dough in a warm place". But what does "warm"
mean? It turns out that natural yeast requires somewhat higher
temperatures to get started, and is more sensitive to temperature
variations. So "warm" means 75-80 degrees (F). If it's cooler
than
that, the rise times will need to be longer. And if it's too cool, you
won't get good results. But no one told you that, did they?
Packaged yeast, on the other hand, seems to work at just about any room temperature, and it remains active for a longer time. So it's pretty fool-proof. Not so with natural yeast - You have to pay attention to temperature, and it's best to keep it at 75-80 deg (F).
Packaged yeast, on the other hand, seems to work at just about any room temperature, and it remains active for a longer time. So it's pretty fool-proof. Not so with natural yeast - You have to pay attention to temperature, and it's best to keep it at 75-80 deg (F).
Need to Know #2 - Handling
For
some reason sourdough seems to be more prone to collapsing
than
dough made with packaged yeast. That's why we stretch-and-fold the
dough instead of agressive kneading. That's also why we use pachment
paper to gently place the dough into the oven. And that's why we often
chill the dough so it's firmer when we move it to the oven.
Need to Know #3 - Growing your Sourdough Starter
As
metioned above, natural yeast works best at 75-80 deg (F). Much cooler
than that and your starter simply won't take hold. And, another
important "need to know" is that the starter may go through a period of
no growth and bad odor for a few days. This is common. Just keep the
starter at 75-80 deg (F) and keep up with the feeding schedule. It will
start growing again, and be ready in 1-2 weeks. (See
recipe below.)
The Tricks
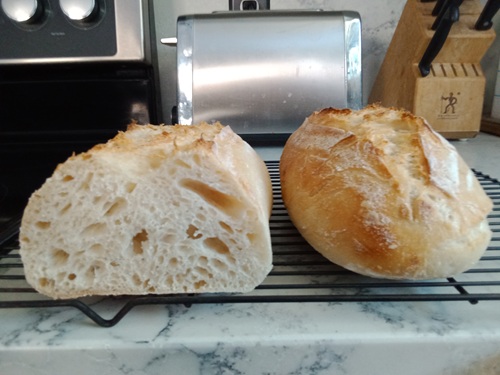
Trick #1, Start by avoiding recipes with wet dough (high hydration).
The
best artisian sourdough breads, the ones with big holes (open crumb)
and good sour taste are made from wet dough. But wet dough is hard to
handle and the surest way for mortal like us to end up with a
flat,
dense loaf. Start with recipies that aren't too wet and be thankful to
end up with something edible.
Trick #2, Chill the dough before baking.
This
firms up the dough so it's less likely to collapse. The basic
idea
is to let the dough rise in a bowl lined with a well-floured towel,
then chill it overnight.
Trick #3, Use parchment paper to lower the dough into the oven.
This
also helps the dough keep its shape. Right before baking,
carefully turn the chilled dough onto parchment paper and then
lower it into the oven.
Finding Your Warm Spot
This is probably the most important task in making sourdough bread. Find a spot where the temperature averages about 75-80 deg (F). If you like gadgets, get this:
Other solutions:
- Use the inside of a microwave oven with the door propped open to keep the little light on. This is what I use.
- Do the same thing with a regular oven. The larger light will use more power, of course.
- Use a table lamp, which will also use more power.
It's OK if the temperature varies a bit. In my "warm spot" the temperature is 70 degrees on a cool morning and 85 degrees on a hot day. But the overall average is about 75-80 degrees, which is what natural sourdough yeast seems to like.
Armed with your "warm spot" and by adding the tricks mentioned earlier, you could probably tackle any sourdough recipe out there with success.
Or you can follow the recipes that worked for me ...
Sourdough Starter Recipe
This is a recipe to make the all important Sourdough Starter. All you'll need is:
- A quart size jar with some sort of loose cover. (I use a small plastic bag).
- Your warm spot, averaging about 75-80 deg (F). <-- Important!
Believe me, this works! I've done this successfully 3 times.
If you follow these instructions, including the all important warm spot of 75-80 deg (F), and you still don't have a good starter after 2 weeks, then there is something wrong with your Karma.
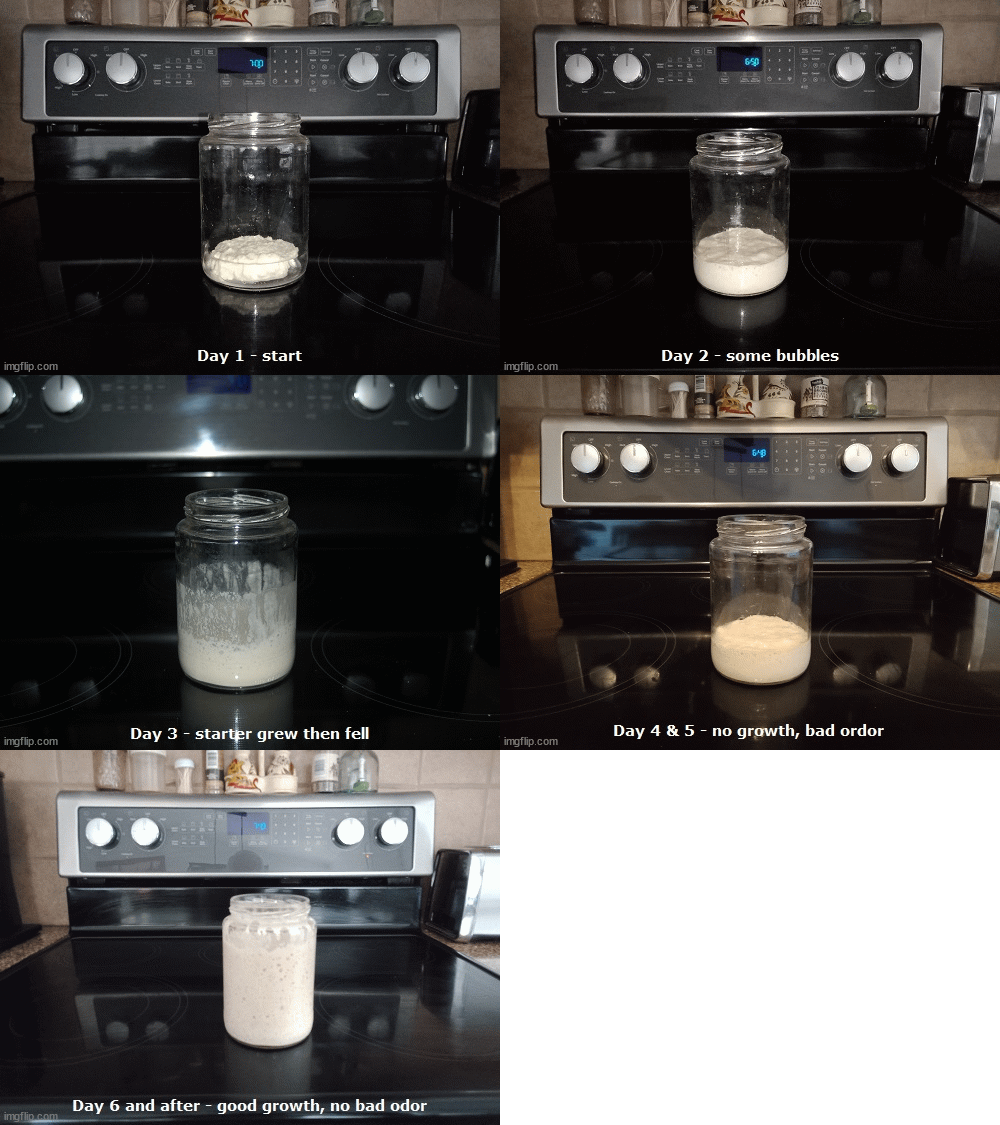 Day 1:
- 1/4 cup unbleached bread flour
- 2 table-spoons water
Mix well, place starter in the
jar, cover loosely, put it in your warm spot, 75-80 deg (F).
(Starter yield will be about 1/4 cup).
(Starter yield will be about 1/4 cup).
Day 2-4:
- starter from previous day
- 1/4 cup unbleached bread flour
- 2 table-spoons water
Mix well, place starter in the
jar, cover loosely, put it in your warm spot.
(Starter yield will increase by 1/4 cup per day, resulting at 1 cup on day 4).
(Starter yield will increase by 1/4 cup per day, resulting at 1 cup on day 4).
Day 5-14:
- discard 1/4 cup of started, keep the rest (3/4 cup)
- 1/4 cup unbleached bread flour
- 2 table-spoons water
Mix well, place starter in the
jar, cover loosely, put it in your warm spot.
(Starter yield will remain at about 1 cup).
Remember! - Ignore any periods where there is a lapse in growth or bad odor. It will soon get better.
Starter is ready when all three of the following are true:
(Starter yield will remain at about 1 cup).
Remember! - Ignore any periods where there is a lapse in growth or bad odor. It will soon get better.
Starter is ready when all three of the following are true:
- It doubles it's size in 6 hours or less after feeding. It's OK if it collapses a bit after peaking.
- It has no bad ordors, but it will have a sort of yeasty aroma.
- It has repeated this pattern for at least 3 days.
Maintaining Your Starter:
- Store the starter in the refrigerator. Some even freeze it.
- It's a good idea to "feed" your starter every month or so by following the steps found in "Day 5-14" above.
- It's also a good idea to "feed" your starter every time you make sourdough bread.
When growing the starter, the only reason for discarding some of it is to prevent ending up with a whole bucket load.
You can use discards in the following ways:
- Keep in the refrigerator.
- Add 1/4 cup to pancake batter or other recipes for a little sour kick.
Sourdough Bread Recipe #1
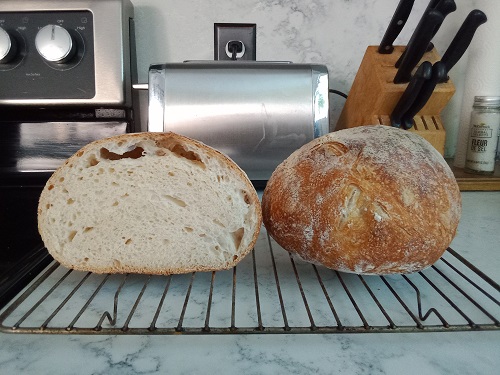
This recipe is almost fool-proof, and it really works! - I've done it several times. If you choose the overnight retard then you can bake it anytime the next day. Or you can bake it the same day by chilling the dough in the freezer for 1/2 hour. This receipe is based on the following link - I adjusted quantities to yield a single small loaf:
For an even better recipe that is softer and easier to slice, see Sourdough Bread Recipe #2.
You'll need a 4-5 quart dutch oven or roasting pan, and a small proofing basket with a cloth liner. Proofing baskets help determine the shape of the loaf. Instead of a proofing basket, I use a medium-sized mixing bowl and a tea towl. A bowl that is 7 inches wide and 4 inches deep is just right.
To keep the dough from sticking to the liner of the proofing basket, it's best to use rice flour or corn starch. Do not use regular flour because the gluten in the flour will absorb moisture from the dough and glue itself to the cloth! Think: gluten = "glue-it-in".
The Night Before - Make the Leaven (or "Levain", if you want to get fancy):
- 1/4 cup starter
- 1/4 cup unbleached bread flour
- 2 table-spoons water
Mix well, cover, put in your
warm spot overnight, 75-80 deg (F).
Also The Night Before -
Replenish and Feed Starter (for next time)- rest of starter
- 1/4 cup unbleached bread flour
- 2 table-spoons water
Mix well, cover, put in your
warm spot overnight, 75-80 deg (F).
Next morning - move to refrigerator for storage.
Next morning - move to refrigerator for storage.
Dough Day, 8:00 am - Mix and Autolyse:
- Leaven from last night
- 1 cup minus 3 table-spoons water
- 1 teaspoon salt
- 2 cups minus 2 tablespoons
unbleached bread flour
Mix leaven and water until
well-mixed.
Add salt and mix again for a few seconds.
Add flour and mix to form a dough.
Cover and rest in your warm spot for 1 hour.
Add salt and mix again for a few seconds.
Add flour and mix to form a dough.
Cover and rest in your warm spot for 1 hour.
9:00 am - Dough Development:
Wet your hands to avoid
sticking to the dough, then shake as much water off your hands as you
can.
Grab one side of the dough and stretch it until it is about 10 inches long. It's OK to pull on the other side of the dough with your other hand.
Drop it over itself to fold it, then rotate the dough a quarter-turn.
Repeat for a total of 5 - 7 stretch-and-folds (click here to see video).
Cover and rest the dough in your warm spot for 1/2 hour.
Repeat the above "stretch-and-fold, then rest" cycle 4 more times, which will take a total of 2 hours.
11:00 am - Bulk Fermentation
(1st rise):Grab one side of the dough and stretch it until it is about 10 inches long. It's OK to pull on the other side of the dough with your other hand.
Drop it over itself to fold it, then rotate the dough a quarter-turn.
Repeat for a total of 5 - 7 stretch-and-folds (click here to see video).
Cover and rest the dough in your warm spot for 1/2 hour.
Repeat the above "stretch-and-fold, then rest" cycle 4 more times, which will take a total of 2 hours.
Cover and place the dough in
your warm spot for 1 1/2 hours.
12:30 pm - Shape
and Proof (2nd rise):This
time don't wet your hands but use flour to avoid sticking to the
dough! (You want to keep the dough from getting too wet).
Perform one last series of stretch-and-folds to build up the height of the dough.
Place the dough on a slightly floured surface.
Rotate and pull the dough toward you several times to form a ball and build surface tension.
Dust the shaped dough-ball with flour.
Drape a tea-towl over your proofing basket. Sprinkle the towl generously with rice flour or corn starch.
Gently place the dough up-side-down on top of the towl and into the proofing basket.
Cover the dough with the corners of the towl, then rest in your warm spot for 2 1/2 hours.
3:00 pm - Cold Retard:
Place the dough in the
refrigerator overnight, or in the freezer for 1/2 hour. (Overnight
aging makes it a bit more sour.)
Bake (next morning, or 1/2 hour later):
Preheat oven to 400 deg (F),
with dutch oven inside.
Place a cookie sheet on the rack just below the dutch oven. This will help the bottom of the loaf from getting too hard.
When the oven is hot enough, cut a piece of parchment paper about 1.5 feet long.
Carefully turn the proofing basket and dough upside down unto the parchment paper, then carefully remove the bowl and towel.
Optionally slit the top of the dough in a cross pattern. (Dont try this at first, because it may cause the dough to collapse.)
Using the parchment paper as a sling, lower the dough into the dutch oven, spray with water, then cover.
Bake for 30 minutes with cover on, then 15 minutes with cover off.
Remove loaf from oven, spray bottom of loaf with water, then let cool on a rack for 1 hour.
Notes:
- Spraying the dough with water just before baking as described above helps it rise in the oven a little better.
- Spraying the bottom of the loaf after baking makes it easier to slice.
- A better idea is to place a small meat-rack into the dutch oven or roasting pan, and lower the dough onto the rack. That really makes it easier to slice! (Thanks Chris!)
Here's a
great example of a one-day recipe with great open crumb (Oh,
how I'd love to have those skills and results!):
Sourdough
Bread Recipe #2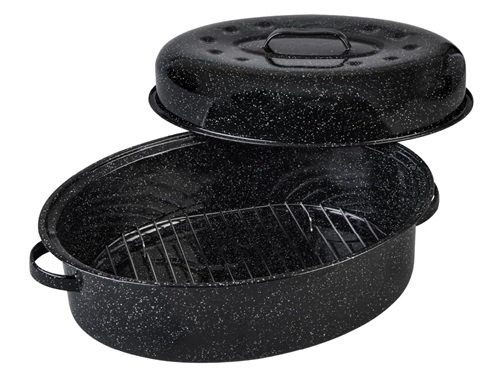
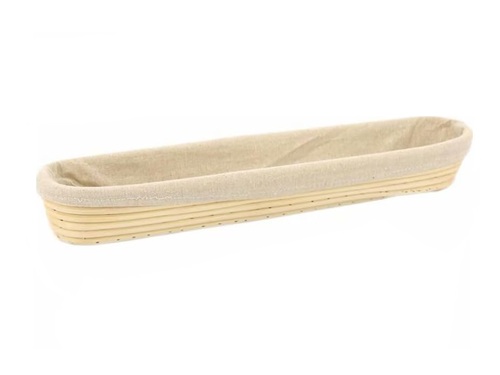
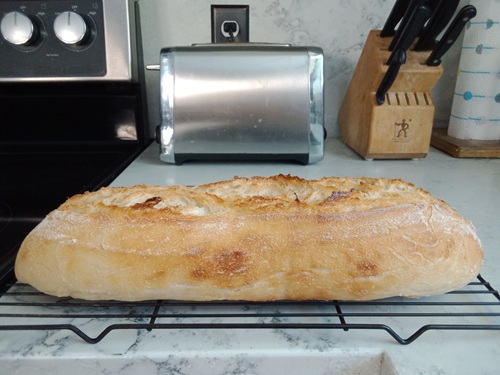
This is a variation of Sourdough Bread Recipe #1, except it's a baguette that is softer and easier to slice. You'll need:
- A short baguette proofing basket
- A roasting pan with a small meat-rack
Then do the following:
12:30 pm - Shape and Proof (2nd rise):
Use flour on your hands to
avoid sticking to the
dough.
Grab one side of the dough and pull to make it longer.
Place the dough on a well-floured surface.
Gently shape and roll the dough until it is roughly the shape of the proofing basket.
Dust the shaped dough with flour.
Sprinkle plenty of rice flour on the cloth of the proofing basket.
Gently place the dough into the proofing basket, sprinkle more rice flour on top.
Cover the dough with a towl, then rest in your warm spot for 2 1/2 hours.
3:00 pm - Cold Retard:
Place the dough in the
refrigerator overnight, or in the freezer for 1/2 hour.
Bake (next morning, or 1/2 hour later):
Preheat oven to 450 deg (F),
with roasting pan and meat-rack inside.
When the oven is hot enough, cut a piece of parchment paper as long as the proofing basket and about 10 inches wide.
Carefully turn the proofing basket and dough upside down unto the parchment paper, then carefully remove the proofing basket.
Slit the top of the dough lengthwise about 1/4 inch deep.
Using the parchment paper as a sling, lower the dough onto the meat-rack in the roasting pan, add 1 cup water, then cover.
Bake for 20-25 minutes.
Remove loaf from oven and let cool on a rack for 1 hour.
Notes:
- The long shape of the loaf makes it bake more quickly. It also makes it easier to grab when slicing.
- Baking the loaf on the meat-rack instead of directly on the pan keeps the bottom of the loaf from getting too hard. (Thanks, Chris!)
- The water added to the bottom of the pan results in a softer crust that people love.